Wednesday 24 December 2014

Kin-Cha-Ku

#KinChaKu Draw string bag pattern by Chase @quarterinchmark 😊I will be making more of these as it's an easy to follow pattern and very cute. #scraptastictuesday
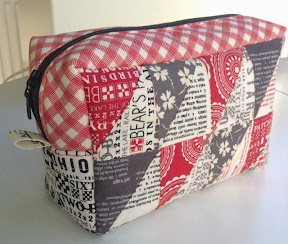
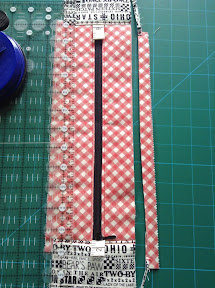
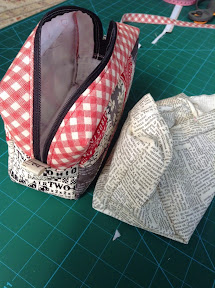
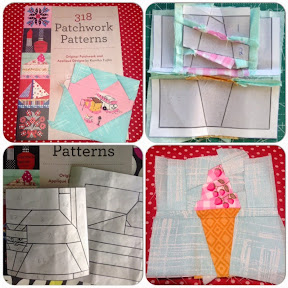
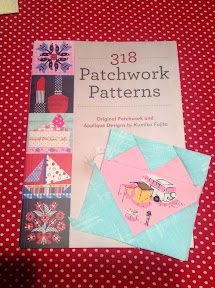
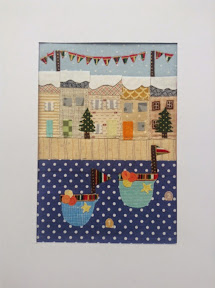
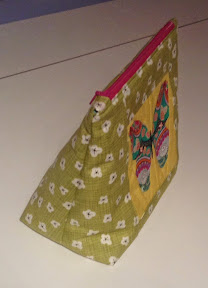
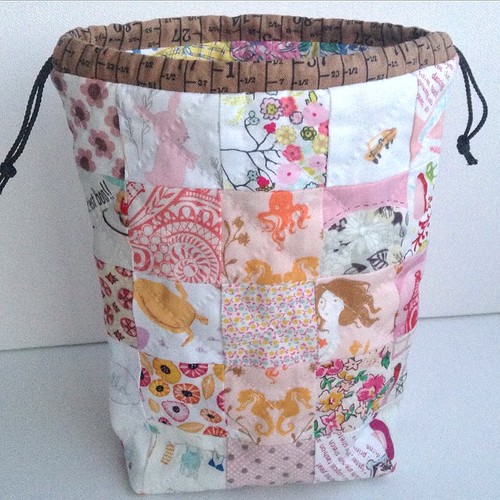
At the last meeting in Exeter of the South West Stitchers I saw Kerry had a beautifully made little draw string bag for all her sewing bits and bobs. It was made by Chase from Quarter Inch Mark who also sells a pattern for the Kin-Cha-Ku in her Etsy shop.
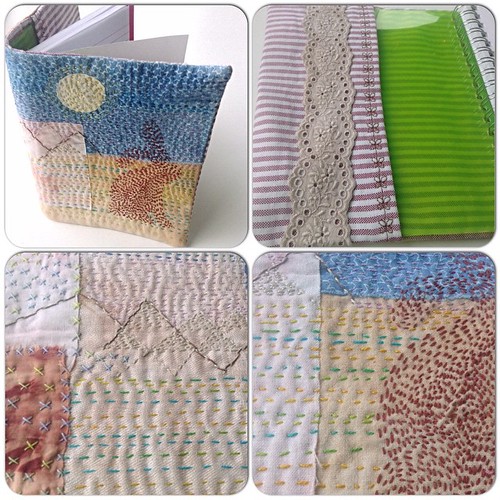
The pattern was well illustrated with lots of photos and very easy to follow. I love the fact it was hand quilted as this adds a lovely texture to the finished bag.My machine is packed away for family Christmas get together today, so back to hand quilting 😊
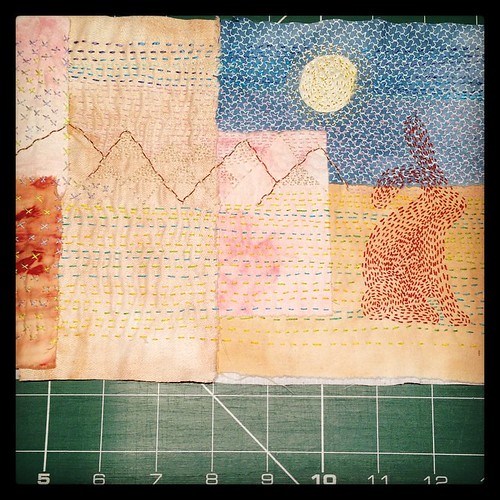
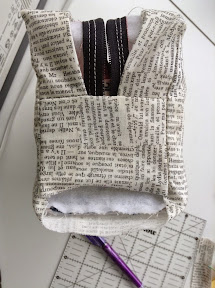
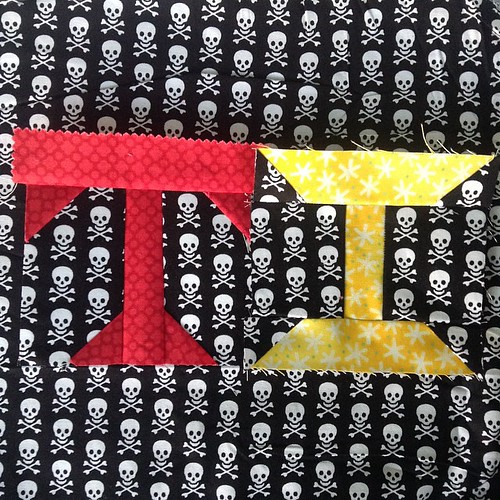
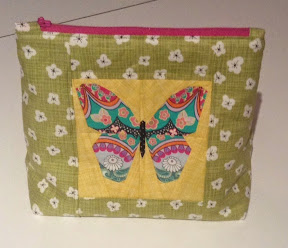
I'm not sure how it ended up this colour as I started out with the scrap of the little deer and the Heather Ross mermaids. I put one row in upside down, but I left it as it was, as it was meant to be. I quilted it with Coats Dual Duty Hand Quilting thread as it was available from Trago for a reasonable £2.95. Only when I got it home did I find out that it's not cotton, but a polyester blend. It looks ok though.
#KinChaKu the other side. Pattern by @quarterinchmark ✂️   @verykerryberry can you see what I lined it with 😍 Brown, pink scraps and a few other #artgalleryfabric bought from @lilysquilts #scraptastictuesday
I'll certainly be making some more Kin-Cha-Ku, which means draw string bag, in the New Year ...... Merry Christmas to you all .... And see you in 2015 xx


Sunday 14 December 2014

Kantha Embroidery

#kantha embroidery finished and now to turn it into a book cover. Started in a workshop with Angela Daymond #fenlandtextilestudio at the #WestCountryQuiltShow
Last month I went up to the West Country Quilt Show in Bristol. A fantastic show with lots of quilts on display and a variety of workshops to attend. There was also the usual trader stalls with lots of bargains .... But unfortunately not many people were there on the Friday that myself and QuirkyHannah visited.
I went to a Kantha workshop run by Angela Daymond from the Fenland Textile Studio. There was only two of us and Angela provided a wonderful bag of fabrics and a variety of threads.
All the fabric and lace, some of it vintage, had been dyed using natural dyes. These included red onion skins, tulips, turmeric, woad and one I might try ... Boiling fabric in an aluminium pan with a variety of berries. The aluminium from the pan fixes the dye.
Angela explained about the history of Kantha and how it was used to make a new cloth from old saris. Traditionally it is all running stitch with different areas of Southern Asia having a different style.
I found making this very relaxing as there wasn't a specific design to follow and the stitches don't have to be accurate or all the same length.
I love the texture of this #kanthaembroidery #lechallenge
I knew I wanted to turn this into a book cover, but unfortunately it wasn't quite big enough and so I added the extra red onion skin piece at the bottom left and also the piece above it. I use a random cross stitch with some beautiful threads which I bought from the Cowslip Workshop christmas fair. The threads are hand painted to make them variegated in lovely colours. I used an old shirt for the inside of the cover and decorated it with some rarely used machine embroidery stitch. I added the lace as I can then tuck extra bits and pieces inside the cover.
upload
The theme for Le Challenge this month is Ink and so I'm linking up with Nat and Lucy.

Tuesday 11 November 2014

Patchwork Please Triangle Patchwork Box Pouch


I've loved looking through the Patchwork Please book and so a couple of months ago I attempted the Box Pouch using a Moda Scrap Bag. There was a sew along when the book first came out and so there was some advice on various blogs. Some said they made it without many problems ... But I found it quite difficult to make.
The book says that there is a 1/2" seam allowance, but the triangle pattern has a 1/4" seam. I sewed all of it with 1/4", this was probably where I went wrong!
I wasn't sure how to attach the top zip panel to the sides, but Alyce from Blossom Heart Quilts explains on her blog that you sew it on the same as you mitre the corners when doing a quilt binding ... that then made sense.


The outer came together ok, but then the lining didn't fit :o(


I left it the right way out for ages and it looked very nice ... But I couldn't use it. Then at the weekend I finally stitched an extra panel in the lining to fix this hole. It's still very badly fitting ... But once filled with stuff it is ok.


Today I went to "Stitch Club" and filled it with bits to finish the clamshell block for my Green Tea and Sweet Beans quilt .... Or Grean Beans and Rich Tea as we have been calling it!
I love the boxy look of the bag, but I won't be making another one for a while. I will try out some of the other box pouch tutorials first.


Off to "Stitch Club" for the afternoon with my newly finished box pouch. It only took me about 6 weeks to fix the lining 😞 #scraptastictuesday #patchworkplease
Linking up with #scraptastictuesday over on Leanne and Nicky's blogs.


- Posted using BlogPress

Monday 3 November 2014

318 Patchwork Patterns


I've loved seeing blocks from the Japanese version of this book over the past couple of years. So when it was published in English I knew I had to buy it. I was even happier when I found out that Allegory from athousandneedles blog was organising a blog hop which included some of my favourite bloggers!


So I though I'd try the easiest blocks first and make them 4". As I don't have a scanner or access to a photocopier I took a photo of the block as square as I could and then put it into word before scaling and printing. I was also able to reverse the Ice cream cone to paper piece it. There are not many directions in the book as to 'how to do this' and so the blog hop has been useful.


All went well with the first two blocks, once I realised I'd have to add boarders to finish them off, and so being Halloween I thought I'd make the cat and cake at 5". I printed the pictures directly onto freezer paper which I'd cut to A4 size and they came out fine..... But the cat has beaten me.... It's just too small, so I've moved onto the cake but it's not finished as I wasted loads of time messing with the cat :o(


I will return to the cat after a bit more practice at freezer paper piecing as described on Kerry's blog. I have a plan to turn these into 3 nesting boxes using 4", 5" and 6" blocks. I need 12 finished blocks so I'll try again to finish the cake.
If you have this book....and some of you must as when I checked Amazon it said only 2 copies remaining, then why not join in the blog hop?
EDIT ... The book also includes a really useful alphabet and so they were quite quick to piece, although those pesky skulls gave me some trouble. in the end I was just happy that they were the right way up!

The #318patchworkpatterns book also includes a really useful alphabet. I struggled to match those pesky little skulls and in the end I settled for them at least being the right way up! #pp318qal

Monday 27 October 2014

Cat Rowe Textile Workshop


Last weekend I went along to South Hill Piecemakers for our Christmas workshop. We had seen samples of Cat Rowe's work at the Cowslip Christmas Fair last year and I had bought a lovely calendar.
Cat lives in Cornwall and usually teaches smaller groups, but 16 of us all had a fabulous day and hopefully didn't give her too much trouble! We also had a lovely shared lunch but I didn't get any photos of that.
This is what I achieved on the day, lots of Bondaweb and fiddley cutting and sticking. Cat had many useful tips about the best fabrics and how to best cut out the smaller parts. I had just started to stitch them down when it was unfortunately time to go home.


Cat provided 3 different Wintery designs or if you were adventurous then you could design your own. The free motion embroidery to do the writing was interesting! I had a go, but I did resort back to my walking foot for most of the stitching.
Below are 4 of the other ladies pictures.


I was super keen to finish mine as otherwise it would have joined the rest of the WIP's. So here it is ..... Framed too!


Then I thought I'd make a card from the robin and a mug-rug from the snowman design. These are now finished too.


So that's it for now, though I love all the pictures in Cat's calendar and I've been asked to make a Polar Bear!


By pure coincidence I bought a 'New Home' card from Waitrose and then found out it was a Cat Rowe design, lovely.


Location:Golberdon, Cornwall

Saturday 30 August 2014

Paper Pieced Butterfly


I love all the paper pieced patterns by Tartan Kiwi and so I was to take up the Butterfly Challenge and create this. I received the Art Gallery fabric when Fiona de-stashed it and I knew it would be perfect for fussy cutting.
To fussy cut the wings I traced the relevant pieces onto plastic. I know you can buy proper template plastic, but I save bits of packaging or milk bottles.
This works well as the wings were the first piece to be placed on all 4 sections.
REMEMBER TO TURN THE PLASTIC OVER TO REVERSE IT!


I like to line up the initial piece using the window and I use fabric glue to keep it in place.


I use the post card method for folding over each section and instead of ironing the small bits I use the wooden thingamajig.


I wanted the bag to have straight sides and a nice flat bottom so I used the tutorial by Katy, I used the same measurements and a width of about 9"


I'm very happy with how it turned out.... Sorry about the bad final pictures as I did forget about the time difference!


You can see that it is 4" wide at the base. Lovely and spacious too.


The Tartankiwi


- Posted using BlogPress from my iPad

Monday 28 July 2014

Hip Bee Blocks

After returning from our travels in Spain and Portugal I had to play catch up with the HipBee blocks. Thankfully all the bees were very patient in waiting for them. I thought I should stitch them in order, but Rachel, Mamafairy had asked for flower blocks in 3 sizes and I'd just borrowed a quilt book from Quilt Club with this Rose of Sharon block....so that was first.


The colours Rachel sent me were suitable for a daffodil, so I found a pattern online, although it was for a 6" square block, so I added longer leaves and a bias stem, once I'd found my Clover bias maker.


I was also looking through Carina's new book Stitched Blooms and I thought that this embroidery pattern would translate beautifully into an appliquΓ©. The book is great as it comes with a CD and so you can print off the design any size you like, 6" square. All of them were top stitched with Aurifil 40 wt, yummy.


I found these ones for Jill, The Nocturnal Stitcher, the hardest as I'd already seen some brilliant designs in the Flickr group, but with limited fabric, I also didn't want to mess up. I found a lovely tutorial on YouTube of how to piece improv curves and took it from there. Unfortunately my second block didn't have enough fabric to make 12" and so I added the best beach fabric I had. I think they look quite cute and will make a lovely picnic blanket.


These two paperpieced blocks were for Second Chance Tan for her mums quilt. I enjoyed piecing these, although it's difficult to judge how much fabric is required as paper piecing can be quite wasteful.


Yippee...all caught up and July is my month. I chose to make these scrappy mini stars using Cindy's tutorial on the Fluffy Sheep Blog. I bought 2 Lark Jelly Rolls...but unfortunately they are nothing like Moda ones. Some of the strips are barely 2.25". So I'm expecting to have to put lots of iron on interfacing on the back to stop little holes appearing :o(


We have one month left in the Bee and then unfortunately due to busy lives we are all buzzing off in different directions to do different things. It's been loads of fun though and thanks to Di of Willowbeck Designs for being a great Bee Mama and organising us so well.

Thursday 17 July 2014

Embroidered Dachshund Broach

Le Challenge - Small


I made this tiny broach from some Liberty Scraps and embroidered it using Aurifil 40 weight. French knots using fine thread were so tiny that they kept popping to the back of the fabric. Jodie who designs the lovely RicRac patterns had this cute Dachshund embroidery pattern as a free pattern available on Craftsy. It was supposed to be much larger, but I used the small illustration and he turned out about two inches long.
It might be a bit big to wear as a broach, but ideal to attach to a bag or put in a frame. I put him on the front of a card and sent him away to a friend who I know likes the Hens Teeth designs, so he is inspired by those lovely creations.
I really enjoyed making him and I can see myself making more in the future as they are ideal to make while away in the van. I just need to think what to print on the top tape...perhaps ... "I love sewing", with a sewing machine or a bobbin? Or "I love the beach"?


Linking up just in time to Le Challenge, why don't you link up with Lucy and Nat something tiny you have made, as there's a chance to win $25, I'm keeping my fingers crossed x
Ps sorry if you have read this twice as I put it on my travel blog "Liberty Blue Van" by mistake

Tuesday 15 April 2014

Midge Net and Drawstring Pouch

Le Challenge - Bright

Just before we came away to Portugal in Libby I finally got around to making the midge net that we needed. We both seem to attract midges, with very big teeth!

I found the perfect BRIGHT neon blue spotty binding for the top and bottom. Sorry girls, it's a very tenuous link!!


We've known for ages that we wanted a midge net, but the problem was also how to attach it to the van. Amazon had the answer, little magnets with hooks, but with a 20kg pull, enough to go through the van carpet lining. Well it's now been tested and it works perfectly.


The net needed a cute little drawstring bag. I wanted it to be unlined and I found this brilliant tutorial on aspoonfulofsugardesigns.com. The bottom is like the base of a coffee bag, which gives it some depth, without having to cut the corners off. You might be able to see what I mean in the top photo. It was such a good tutorial that I made a matching one for my down jacket, that I picked up in T K Max for a bargain £16.
These are the first things that I've made from this camping organic Birch fabric and I was very disappointed that the brown dye, left marks in my green water when I ironed it :o(
I will be washing the whole lot, before I use it in anything else.


....and other news, I didn't finish anything in my finish along list, despite its length, but I did start something else new. I've been embroidering the Best Friends Forever block of the month and managed one a week, so far!


I'm also slowly stitching EPP diamonds into stars and love the pattern already. These are both great hand stitching projects to have along in the van with me and it's nice to have the time to sit and sew. Other British 'vanners' are complaining about the loss of the BBC transmission to their satellite dish...wot no East Enders!!! Not a problem for us though.


Location:Alvor

Saturday 15 March 2014

My First Custom Order


Yipeeeeee...I've finally made some money from sewing. My friend ordered one of these to give to her friend as a birthday present. It's a drawstring bag for putting campervan thermal window mats in.... And I received real money for making it!!!
Though the fabric is a lovely design, it wasn't cotton and frayed like mad and so I did a French seam to make it last a bit longer. It was also quite difficult to photograph, so I strung it from the washing line!
Please ignore the ladder and the Canadian canoe and look at the pretty pink Camellia instead!


Linking up with Le Challenge....who's theme this month was order. I had several ideas as the theme left it open wide, but this one fitted the best. Amazingly the word order came up in two blog titles next to each other in Bloglovin! Nicole from Follow the White Bunny was blogging about the Order to stitch things in an embroidery, she has lots of interesting stuff, so pop over and take a look.